Dual Boot Windows and Mac OS X
Before proceeding with dual-booting Windows alongside Mac OS X, be sure you want to do this because using boot camp and installing Windows alongside Mac OS X may take a lot of space and we all know that memory in case of a Macintosh is fairly expensive.


Requirements
- You'll need a non-enterprise 64-bit Windows 7 or higher and a Mac from after 2009(the earlier versions do not support installation of Windows 8 or higher).
- You'll also need a full version of Windows which means, an upgraded version won't work.
- A USB drive of size at least 8 GB to install Windows and appropriate drivers.
Do create a backup of your data as a slight mistake or any bug may result in loss of precious(or not so precious) data.
Installation
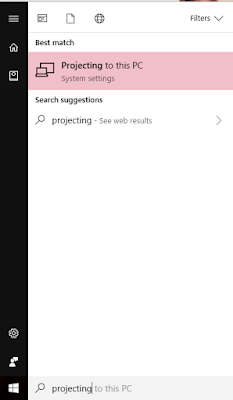
For installation of Windows, you'll use Boot Camp Assistant application that already comes with your Mac. Open it by pressing Command+Space, typing Boot Camp and pressing Enter.
The Boot Camp automatically copies Windows installation files from an ISO or a physically attached disk to a USB drive. Windows will install itself on your Mac. The latest Windows drivers will also be downloaded from Apple and placed on this drive and they'll be installed automatically after Windows. It is here where you will be guided through the process of resizing your partitions and creating a new Windows partition.
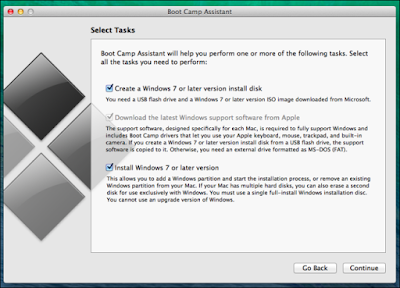
On the first page, leave all the boxes checked.

Now choose the location of the ISO file.

The screen will read Copying Windows Files as Mac will create the Windows installer drive it will need. Patience is required as this process may take time. The progress bar may even seem stuck at a point for quite some time.

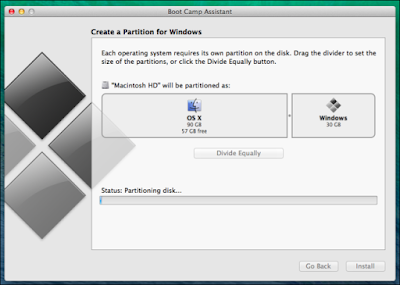
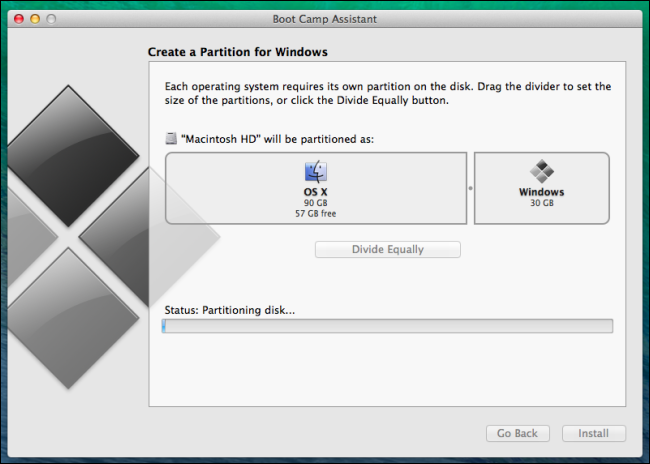
After Mac finishes creating a USB installation drive, you'll see the Create a partition screen.You can now divide Mac's system drive into two separate drives- one for Windows and the other for Mac. It's up to you how you want to allocate the space for which OS.
If you want to resize the partitions after this process, you will need a third-party tool. Click the install button and Mac will start working upon resizing and creating new partition for Windows. Mac will then restart and boot the Windows installer from the USB drive. Select the partition BOOTCAMP and format it as NTFS.
Note: Choosing the wrong partition will wipe out Mac OS X so be sure as many times as you can be.
Windows will install normally and after the drivers are installed,, i.e., the Boot Camp installer finishes, you're free to remove your USB drive.
The Boot Camp Control Panel
In the system tray, you'll find the Boot Camp Control Panel running. Open it.

This control panel allows you to choose the default OS on startup. You can choose either Mac OS X or Windows as your default OS.

Removing Windows from Mac
If you no longer want Windows on your Macintosh, you can remove it and free space. All you have to do is reboot to Mac OS X and open Boot Camp Assistant. You'll see Remove Windows 7 or later version option if Windows is currently installed.

When you click continue, Boot Camp will automatically uninstall Windows and expand Mac OS X to the freed space.
Note: Do create a backup of your files on Windows as they too will be erased.


Comments
Post a Comment