Dual Boot Windows and another Windows
Sometimes it so happens that we have one version of Windows installed on our computer and we want to try out another recently launched version but we neither want to format and replace our older Windows nor does our computer support virtualisation. In such a case, dual-boot may come handy. Here I have taken the example to installing Windows 8 alongside Windows 7 but you can do this for any version.


Creating some space
Initially you need to free about 20GB of data that Windows 7 has occupied. To do so, open disk management utility (Win+R then diskmgmt.msc and enter). Now you need to right click on the C: drive and select Shrink Volume to reduce the partition size.
A dialog box will appear asking how much space you want to shrink from the drive. Remember that the size is always in MB (1GB=1024 MB) so do a little bit of calculation before actually shrinking the size.

Once your volume is shrunk, the reduced space will be visible as unallocated memory and represented with a black header. Now you need to create a new partition out of this unallocated space. To do so, right click on it and select New Simple Volume.

Now a wizard will launch which will take you through the steps of creating a new partition. It is recommended that you just press next as the amount of data you cleared will automatically be displayed in the wizard.

In the next dialog box, you will be asked to choose a drive letter. Just go with the defaults or choose any drive letter you like.
\

On the format partition step of the wizard you can leave everything to defaults except for the format label which you can keep something memorable like Windows 8.

Click Next and finish to initiate the format. Once formatting is complete, you'll see that the black header has now been replaced by a blue header signifying that it is now an individual drive.
Installation
Insert any media installation drive/disk to begin installation.

Once you've chosen your preferred language, click next to begin installation.


After installation, as always, you will be prompted to read the License agreement document, check agree and proceed. Now you will see the custom installation option.

Now comes the use of the partition we created earlier. Remember to choose only that partition which you had created exclusively for your Windows otherwise there may be loss of important data which none of us want.

Once you have selected the partition, click next and the final step of installation will start.
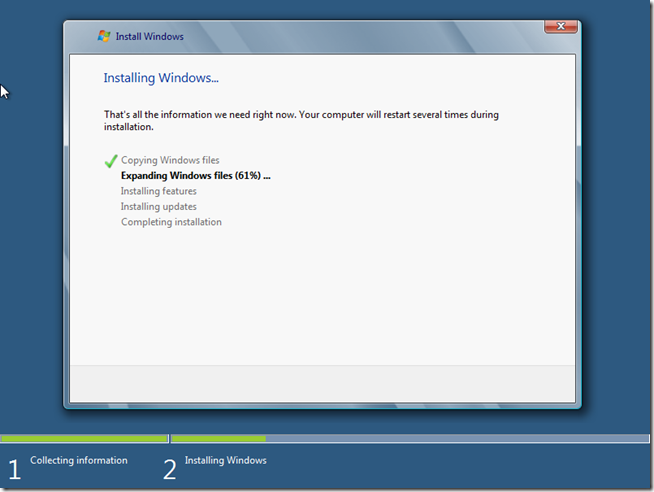
The remaining steps are those of personalization, giving your PC a name, logging in with your email and setting default which you will be automatically prompted to do.


Comments
Post a Comment