How To Use a Windows Laptop as a Wireless Monitor for another PC
Let us suppose you want a secondary screen to increase your productivity in Windows 10, but you don’t have another monitor handy. However if you have a recent Windows device such as a laptop or tablet, you can use it as a wireless monitor.
On the second drop-down menu, you can control whether or not Windows notifies you each time a device tries to project to your PC, or only the first time a new device connects. If you are planning on using the currently chosen monitor frequently, choose First time only.
Basic Requirements
In order to make the most of this feature, you’ll need two Windows 10 machines that support the Miracast streaming video standard. Most latest devices have this feature built in. However, if you’ve built your own desktop, or have one that doesn’t have a Wi-Fi adapter, you might be out of luck with Miracast. To make this work, you’ll need to connect both machines on the same local Wi-Fi network.
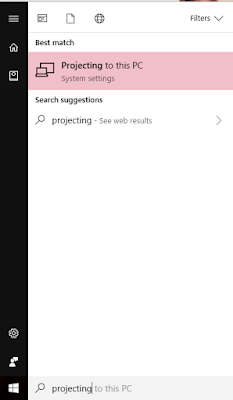
If you are unsure if your Windows device supports Miracast or not, click the Start button, type Projecting into the search box, and then click the result that says Projecting to this PC. If the settings menu says “This device doesn’t support receiving Miracast” then you won’t be able to use it as a wireless monitor.
Step One: Setting Up The Receiving PC
Before you connect the two Windows machines, you’ll need to enable the connection. On the PC that you want to use as a wireless monitor or the receiving PC, click the Start button, type Projecting to this PC into the search box, and then open the result.
This takes you to a Settings window. On the first drop-down menu, select Available everywhere or Available everywhere on secure networks.
For your own safety, it is recommended to turn on the Require PIN for pairing option especially in a crowded or insecure space. And the final option lets you prevent projection from happening when the laptop is not plugged in. Monitor projection can be heavily battery draining.
Make a note of the PC Name at the bottom of the screen (in the above case, it is Rohit) . Now switch to the main PC—the one you want to use as the host for the wireless monitor. dhbvsjdbd
Step Two: Establishing Connection
With your receiving PC ready, you can now project your screen from the main computer.
On your keyboard, press Windows+P to open the Project menu. On a touchscreen, you can slide your finger in from the left, and then tap “Project” at the bottom of the Action Center menu. You can also type Project to a second screen in the search bar to open the Project menu.
After a moment, the receiver machine you set up in Step One will appear in the list. Click it.
The receiver machine will display a screen that says “[Host] is about to connect.” (If you’ve set up a PIN or a permission request in Step One, you’ll need to verify the connection here.)
By default on the first connection, your secondary machine will merely mirror what’s on your primary PC’s screen. To tweak this and use the secondary PC as a full extended monitor, proceed to Step Three.
Step Three: Adjusting Your Monitor
Click the Start button on your main PC and type Change display settings into the search box, and then select Change Display Settings.
On this menu you can treat your receiver PC as any standard monitor. For ideal use of the screen, open up the Multiple Displays dropdown menu, and then choose the Extend these displays option. Click Keep changes on the warning that appears.
Now your desktop space is expanded across the screens of both your primary PC as well as your receiver PC. You can run programs on the second screen and the main screen simultaneously, or even extend a single program window across both of them.
By default the receiver PC screen will be positioned to the right of the main PC. If this doesn’t match the physical configuration of your screens, you can click and drag the screens around at the top of this menu, and then click on Apply.
Of course, your receiver PC is still running its own instance of Windows underneath the projected desktop. You can switch screens to your own by pressing Alt+Tab (or sliding your finger in from the left edge of the touchscreen). The projected monitor from the main PC is a window labelled Connect.
Once you are done, you can stop using your receiver PC as a wireless monitor by pressing Windows+P or slide the Action Center open and tap “Project.” Click or tap Disconnect at the top of the menu. Your wireless monitor will also stop working if the receiver PC shuts down.


Comments
Post a Comment